This guide will help you set upevents in Google Tag Manager - making them ready to be reviewed in GA4.
Estimated time to complete: 30-60 minutes
Even if you are new to Google Tag Manager, you should be able to successfully set up the events by following each step carefully.
If you would like us to set up event tracking for you instead, please reach out to us at help@aviou.io.
Contents:
1. Setting up AVIOU in Tag Manager
3. Set up the Slider Navigation event
6. Set up the Add-To-Cart event
7. Setting up custom dimensions in GA4
1. Setting up tracking in Tag Manager
Start by setting up thePublisher “eventAction” variable to allow for tags to trigger when predefined events are fired. In the following, text that should be entered exactly the way it is written is wrapped in quotation marks. Do not include the quotation marks when you copy these pieces of text.
Variable 1: event action
Navigate to the Variables tab:
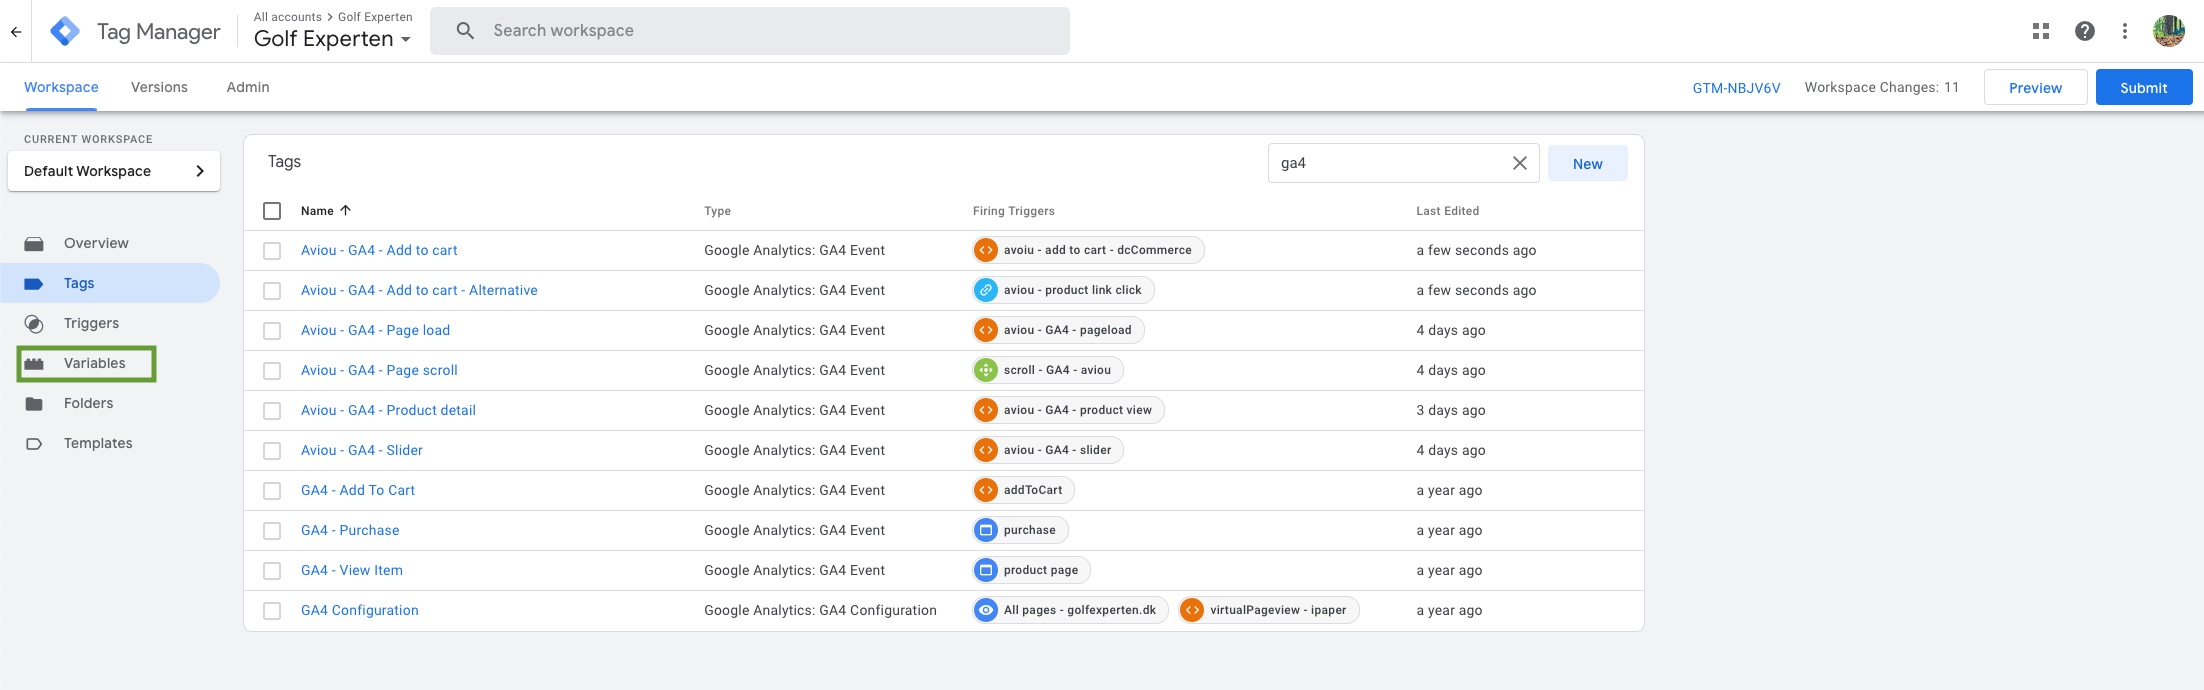
Click the New-button:

- Name your new variable “publisher- event action” and choose "Data Layer Variable"
- Under Data Layer Variable Name enter “eventAction”
- Ensure that the data layer version is Version 2
Save the variable.

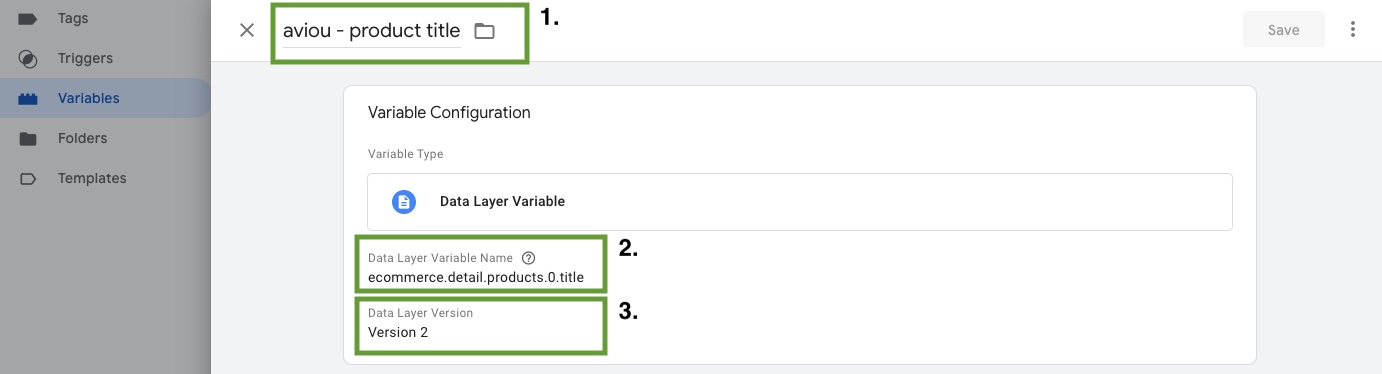
Variable 2: Product title - read more
First, we want to ensure we get the product title as a part of our Read More event to allow for analysis of which items are viewed the most on the page.
- Navigate to the Variables tab, create a new variable, and name your new variable “publisher - product title”
- Under Data Layer Variable Name enter “ecommerce.detail.products.0.title”
- Ensure that the data layer version is Version 2
Save the variable.
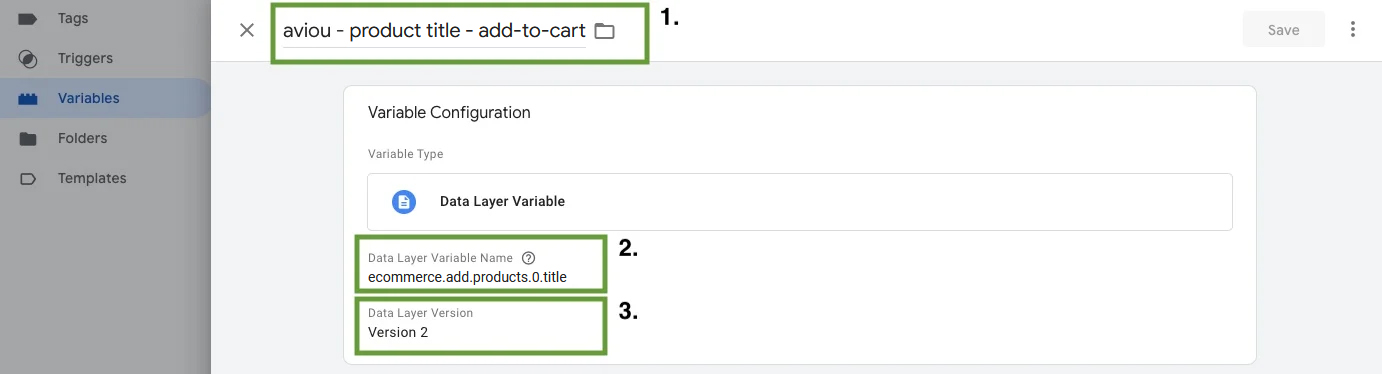
Variable 3: Product title - add to cart
First, we want to ensure we get the product title as a part of our Add to cart event to allow for analysis of which items are viewed the most on the page.
- Navigate to the Variables tab, create a new variable, and name your new variable “aviou - product title - add-to-cart”
- Under Data Layer Variable Name enter “ecommerce.add.products.0.title”
- Ensure that the data layer version is Version 2
Save the variable.
You are now ready to set up the specific events!
2. Set up the Page Load event
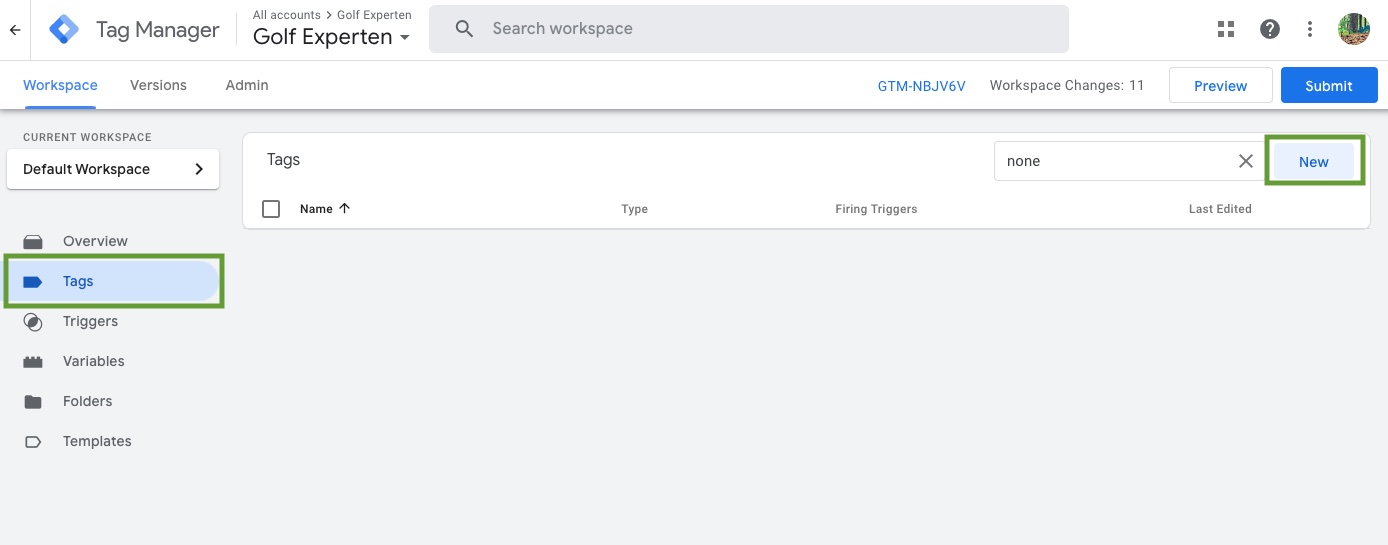
Navigate to the Tags tab to start setting up your new event.
Click the New-button:
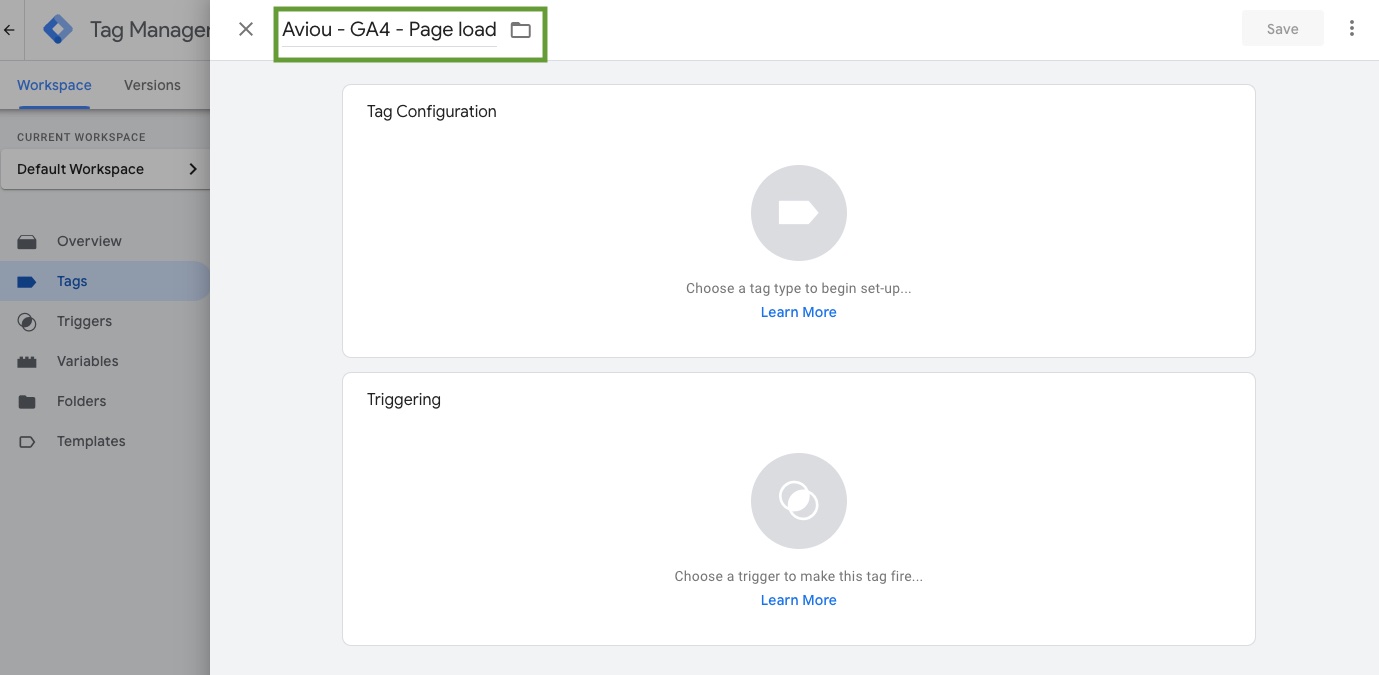
Call the tag “AVIOU - GA4 - Page load”:
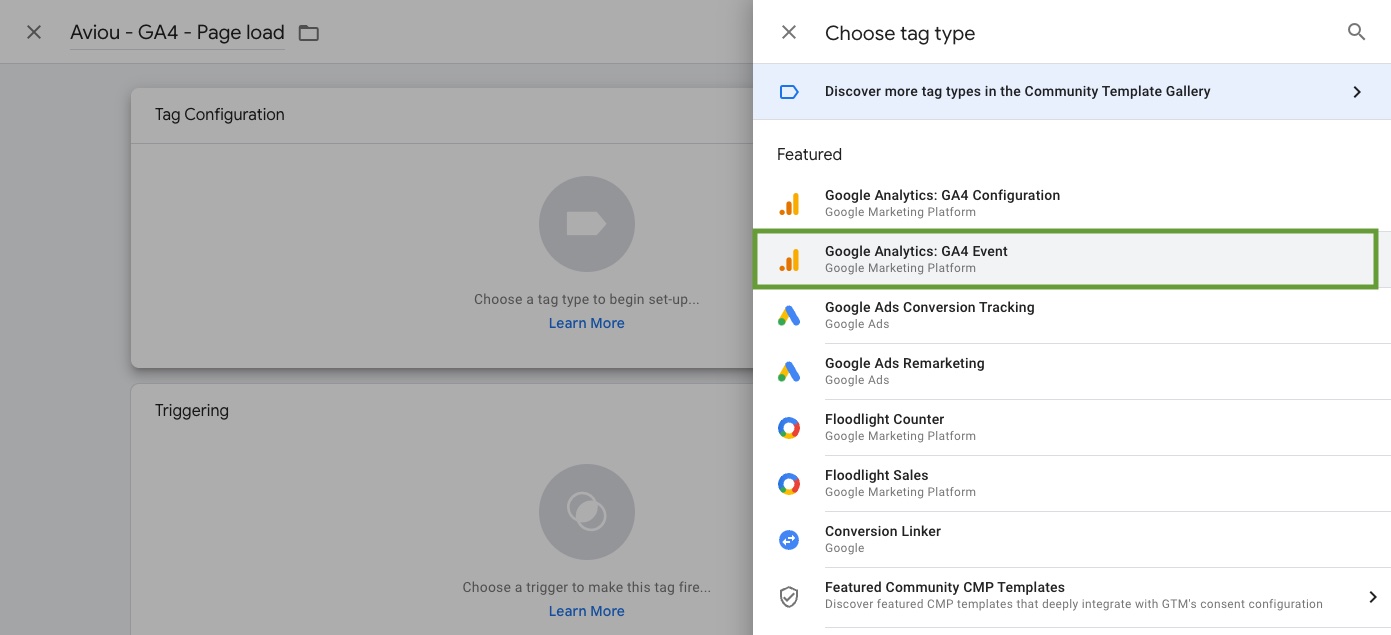
Under Tag Configuration, select the tag type called Google Analytics: GA4 Event:
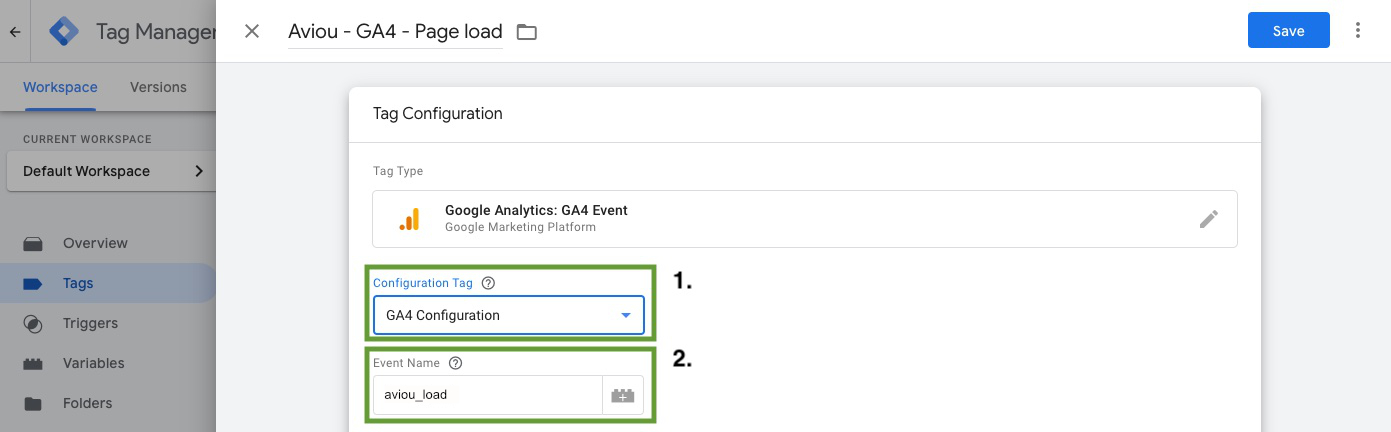
- Now select the Configuration Tag for GA4 in the dropdown list, it is often named something along the lines of “GA4 config” or “GA4 configuration”. You can find it in your list of named Tags.
- Give your event the name “aviou_load”
Now it is time to create the trigger for your tag. Select the “Choose a trigger to make this tag fire...” option:

A “Choose a trigger” panel will appear. Click the + to create a new trigger:
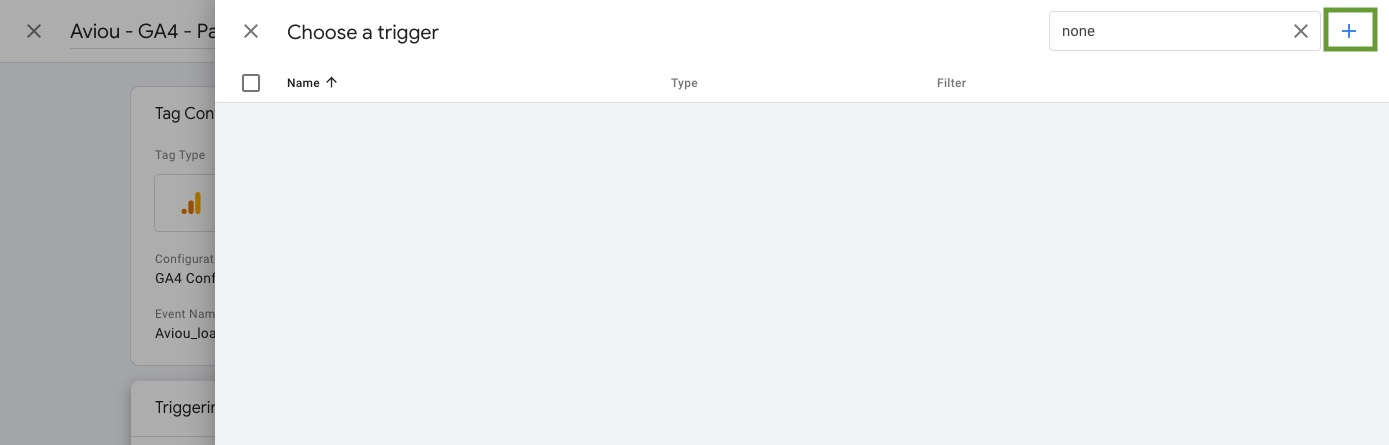
Name your trigger, we recommend you name it “AVIOU - GA4 - pageload”:
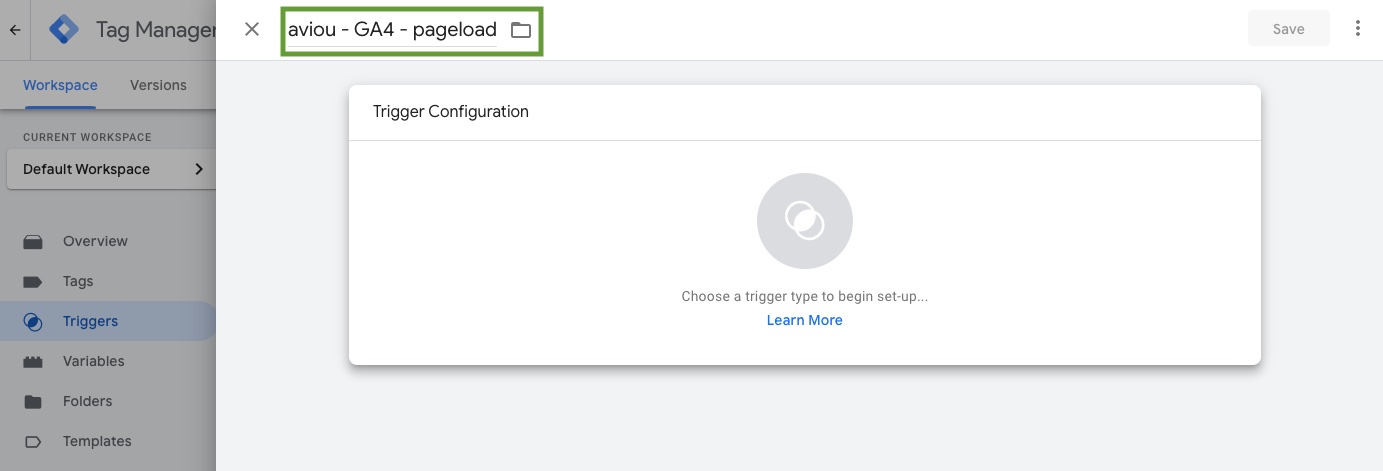
Now select the Trigger configuration option and choose the Custom event trigger found under the section "Other":
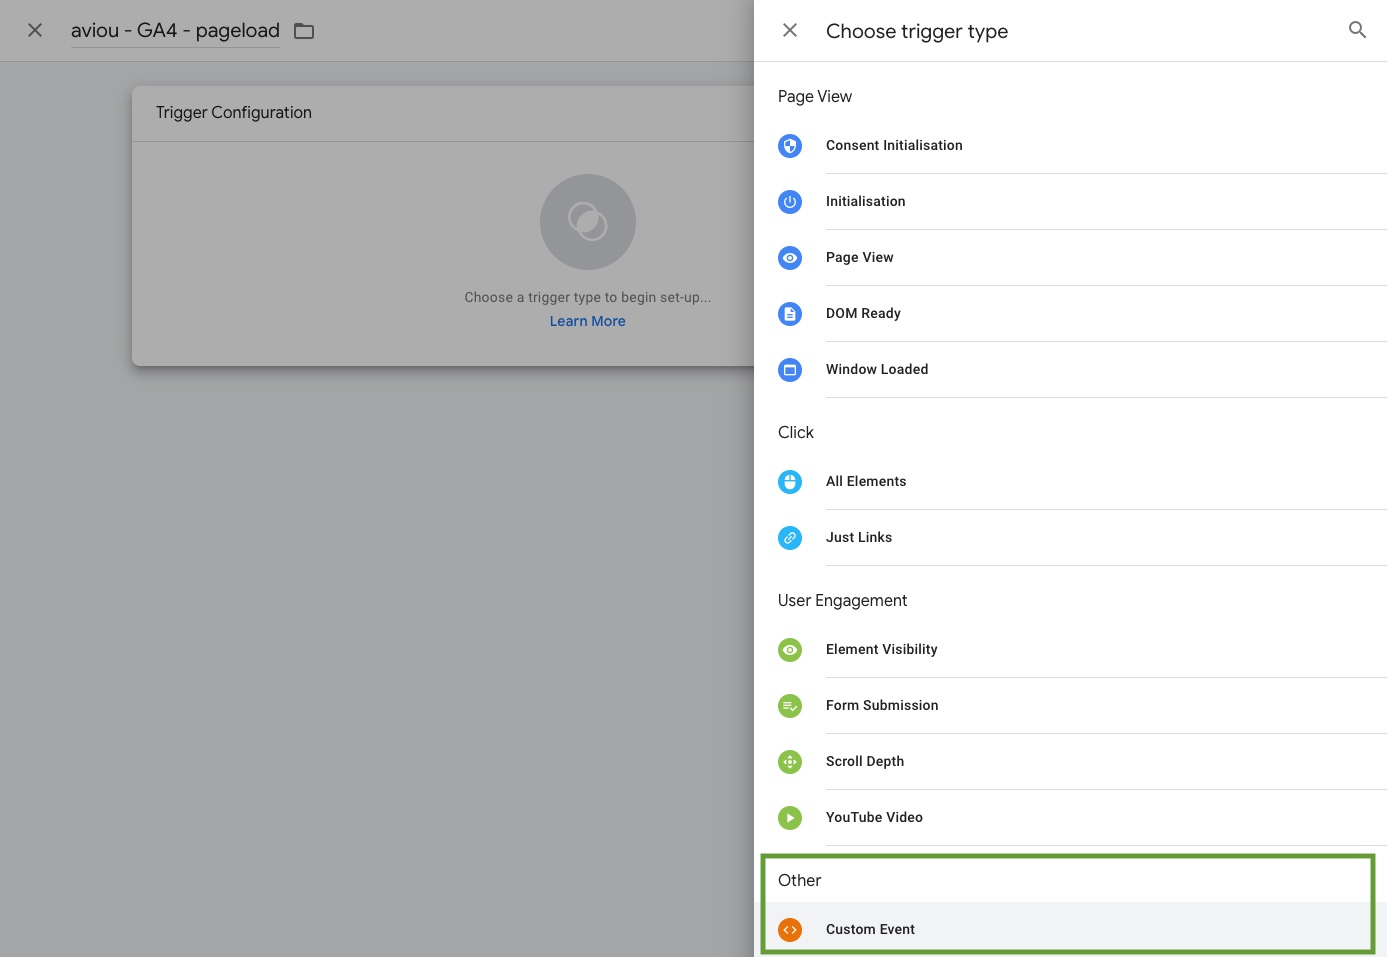
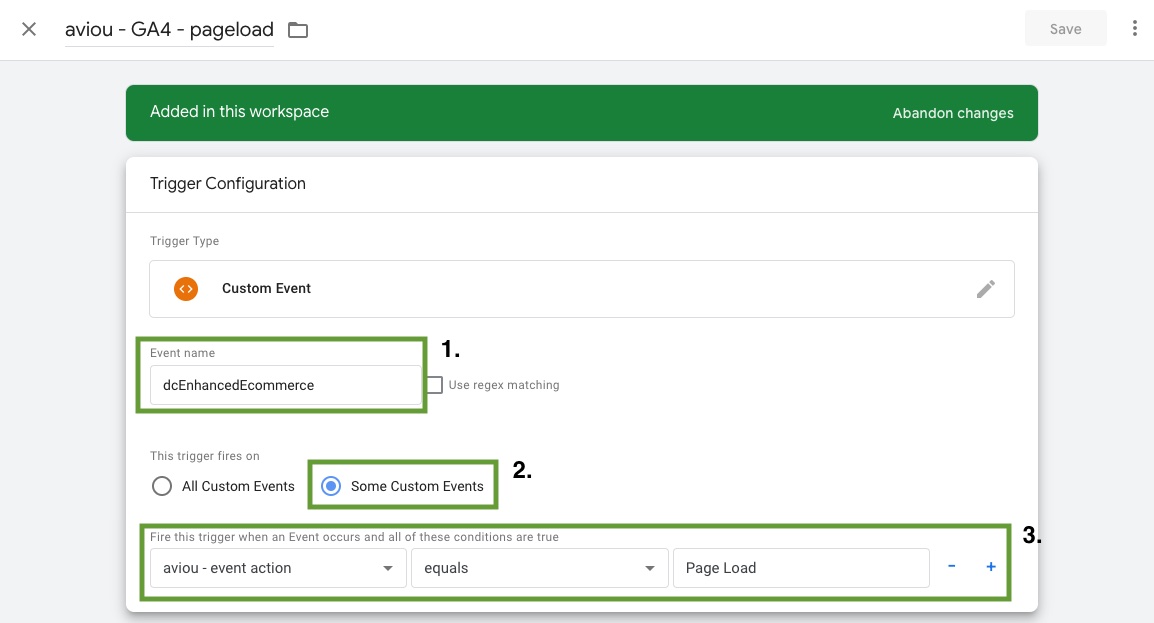
- Set the Event name to “dcEnhancedEcommerce”
- Mark the option for This trigger fires on to Some Custom Events
- Now you have a dropdown menu furthest to the left, where you select the variable, you named earlier; “aviou - event action”. In the middle dropdown you select In the input field to the right you type “Page Load”
You are done! Click the Save-button to save the Trigger and then also save the Tag.
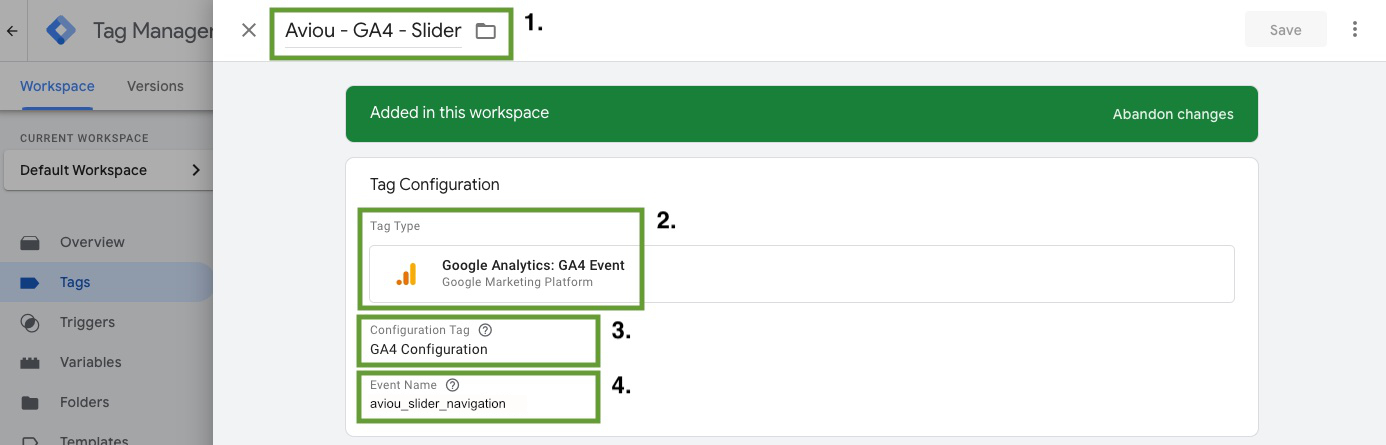
3. Set up the Slider Navigation event
Navigate to the Tags tab to start setting up your new event.
- Click the New-button and name the tag “AVIOU - GA4 - Slider”
- Select the tag type called Google Analytics: GA4 Event
- Now select the Configuration Tag for GA4 in the dropdown list
- Give your event the name “aviou_slider_navigation”
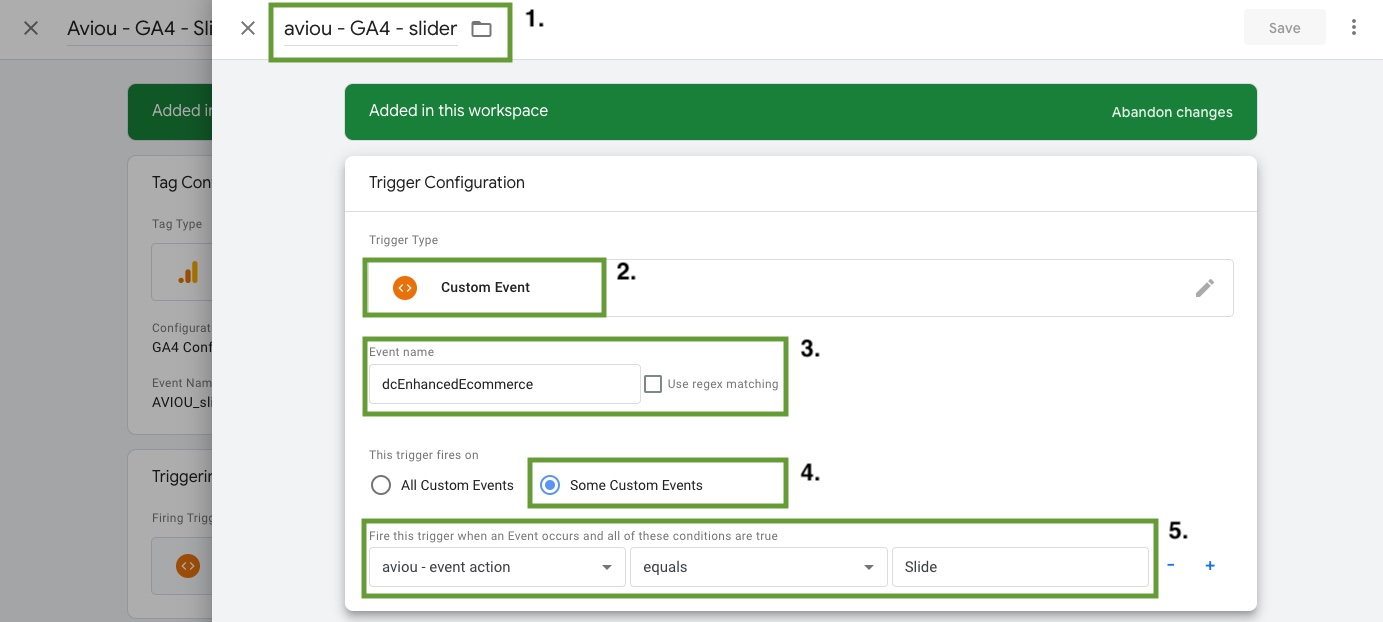
Now it is time to create the trigger for your tag
- Create a new trigger and name it “AVIOU - GA4 - slider”
- Now select the Trigger configuration option and choose the Custom event trigger
- Set the Event name to “dcEnhancedEcommerce”
- Select Some Custom Events
- Now select the variable “aviou - event action”, set to equal and enter “Slide” in the input field
You are done! Click the Save-button to save the Trigger and then also save the Tag.
4. Set up the Scroll event
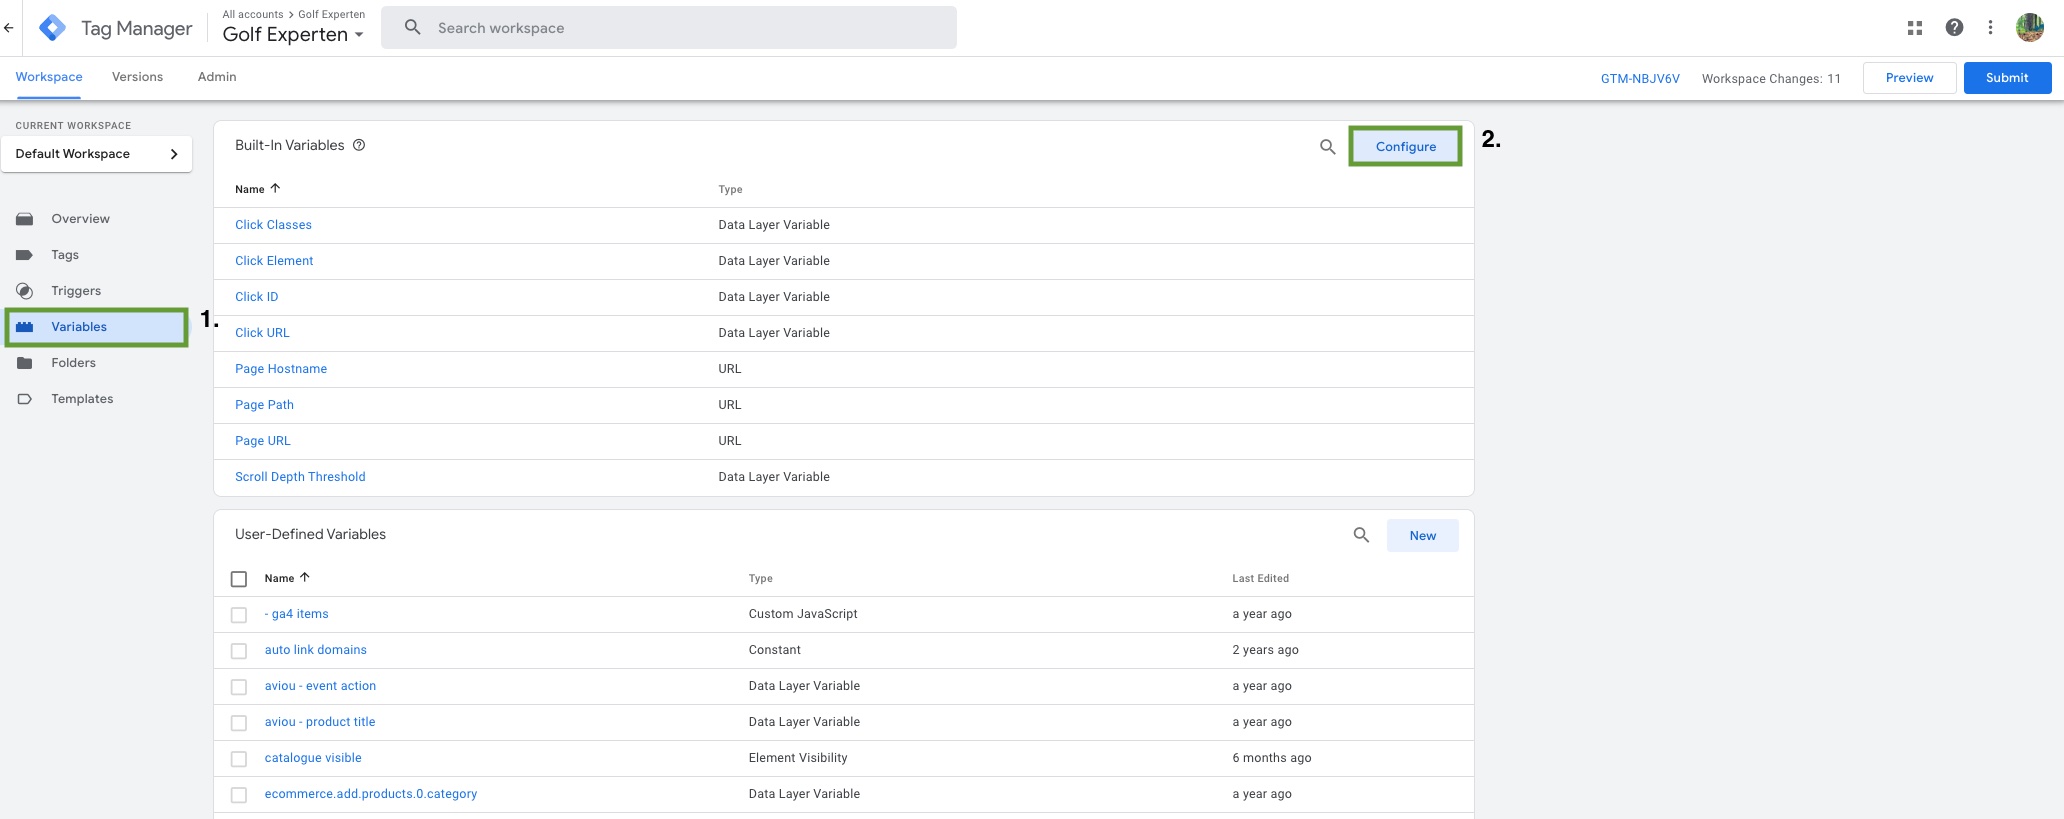
First you need to ensure that the Scroll Depth Threshold variable is enabled on your account.
- Navigate to the Variables tab
- Click the Configure button for Built-in Variables
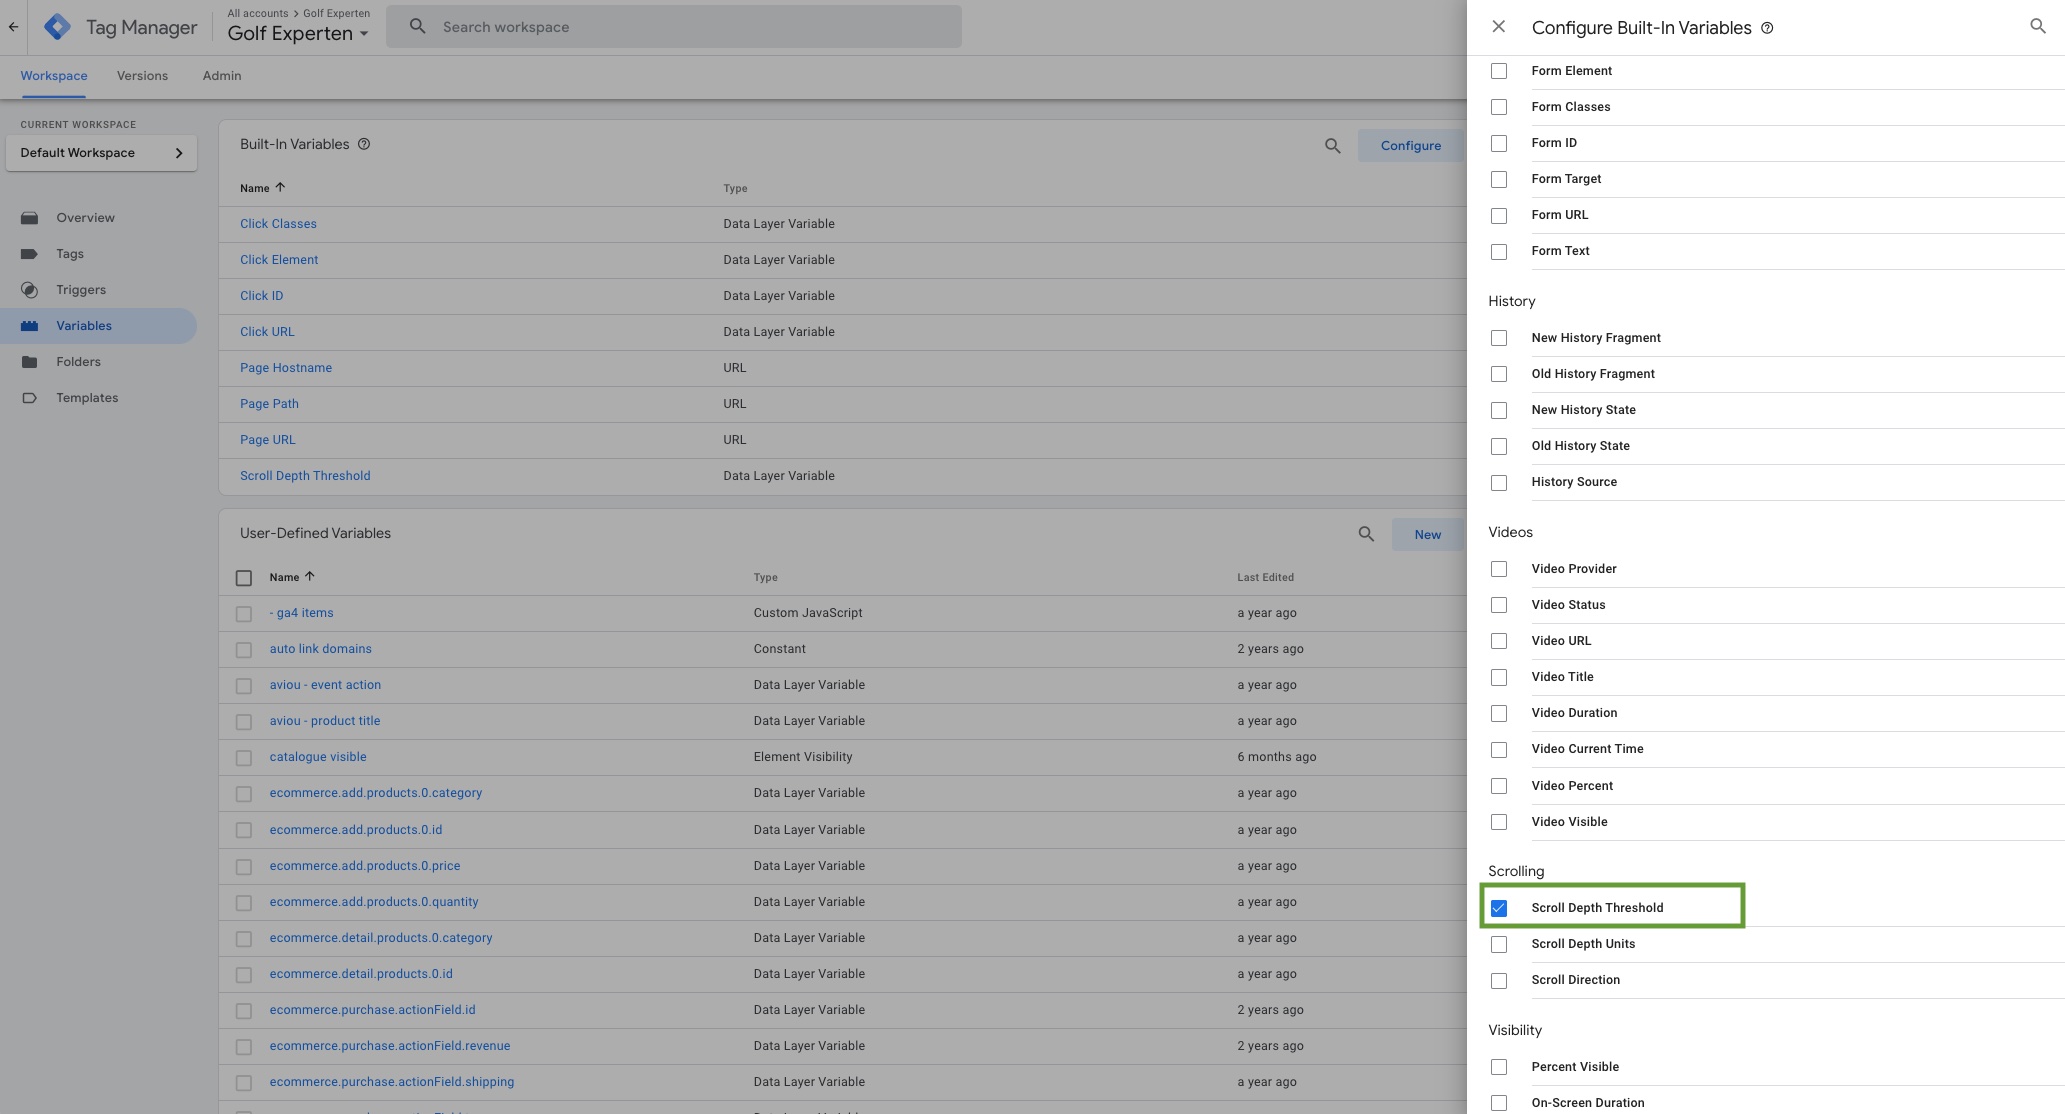
Scroll to the bottom of the list and select the variable Scroll Depth Threshold. Now exit the list, and you should see the added variable in the list of Built-in Variables.
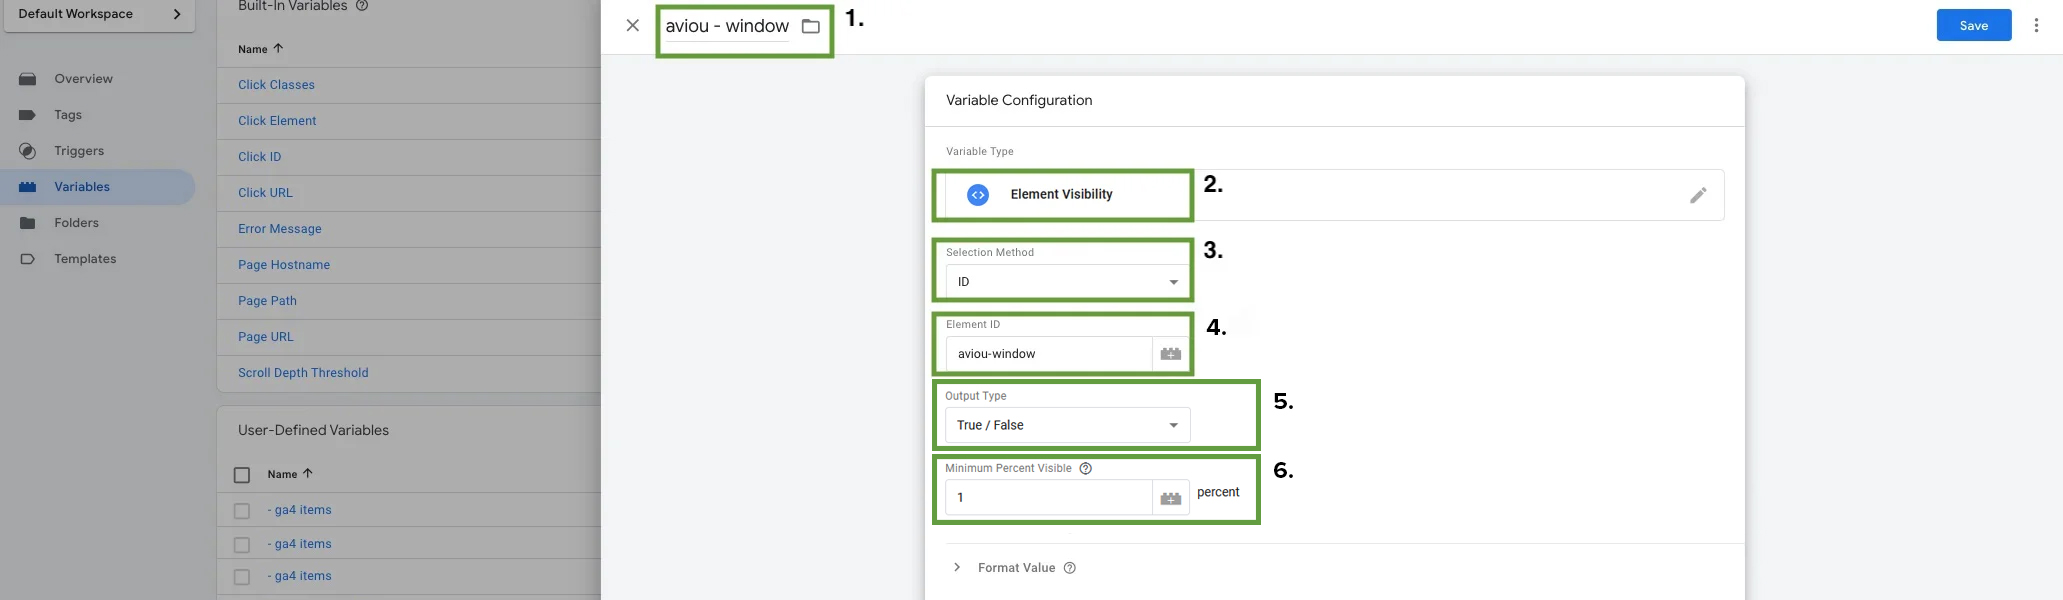
You should now add another user-defined variable and do the following:
- Name it “aviou-window”
- Select the Variable Type called Element Visibility
- Choose the selection method ID
- The Element ID should be called “aviou-window”
- Output Type should be "True / False"
- Set Minimum Percent Visible to "1"
Navigate to the Tags tab to start setting up your new event.
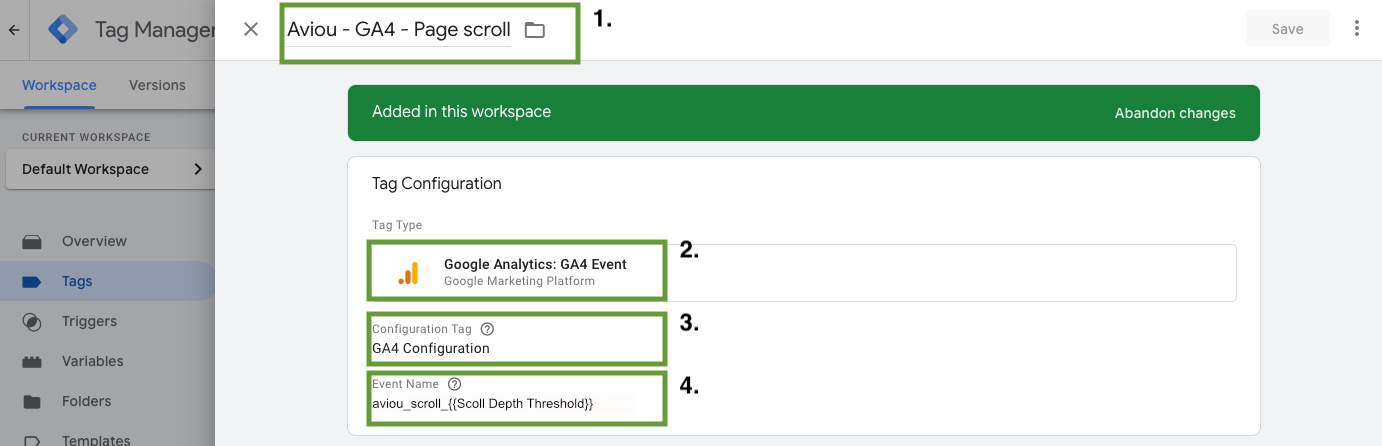
- Click the New-button and name the tag “AVIOU - GA4 – Page scroll”
- Select the tag type called Google Analytics: GA4 Event
- Now select the Configuration Tag for GA4 in the dropdown list
- Give your event the name “aviou_scroll_" and select "scroll_depth_threshold" from the dropdown that appears. Make sure the curly brackets are included.
Now it is time to create the trigger for your scroll tag by clicking on "Choose a trigger to make this tag fire..."
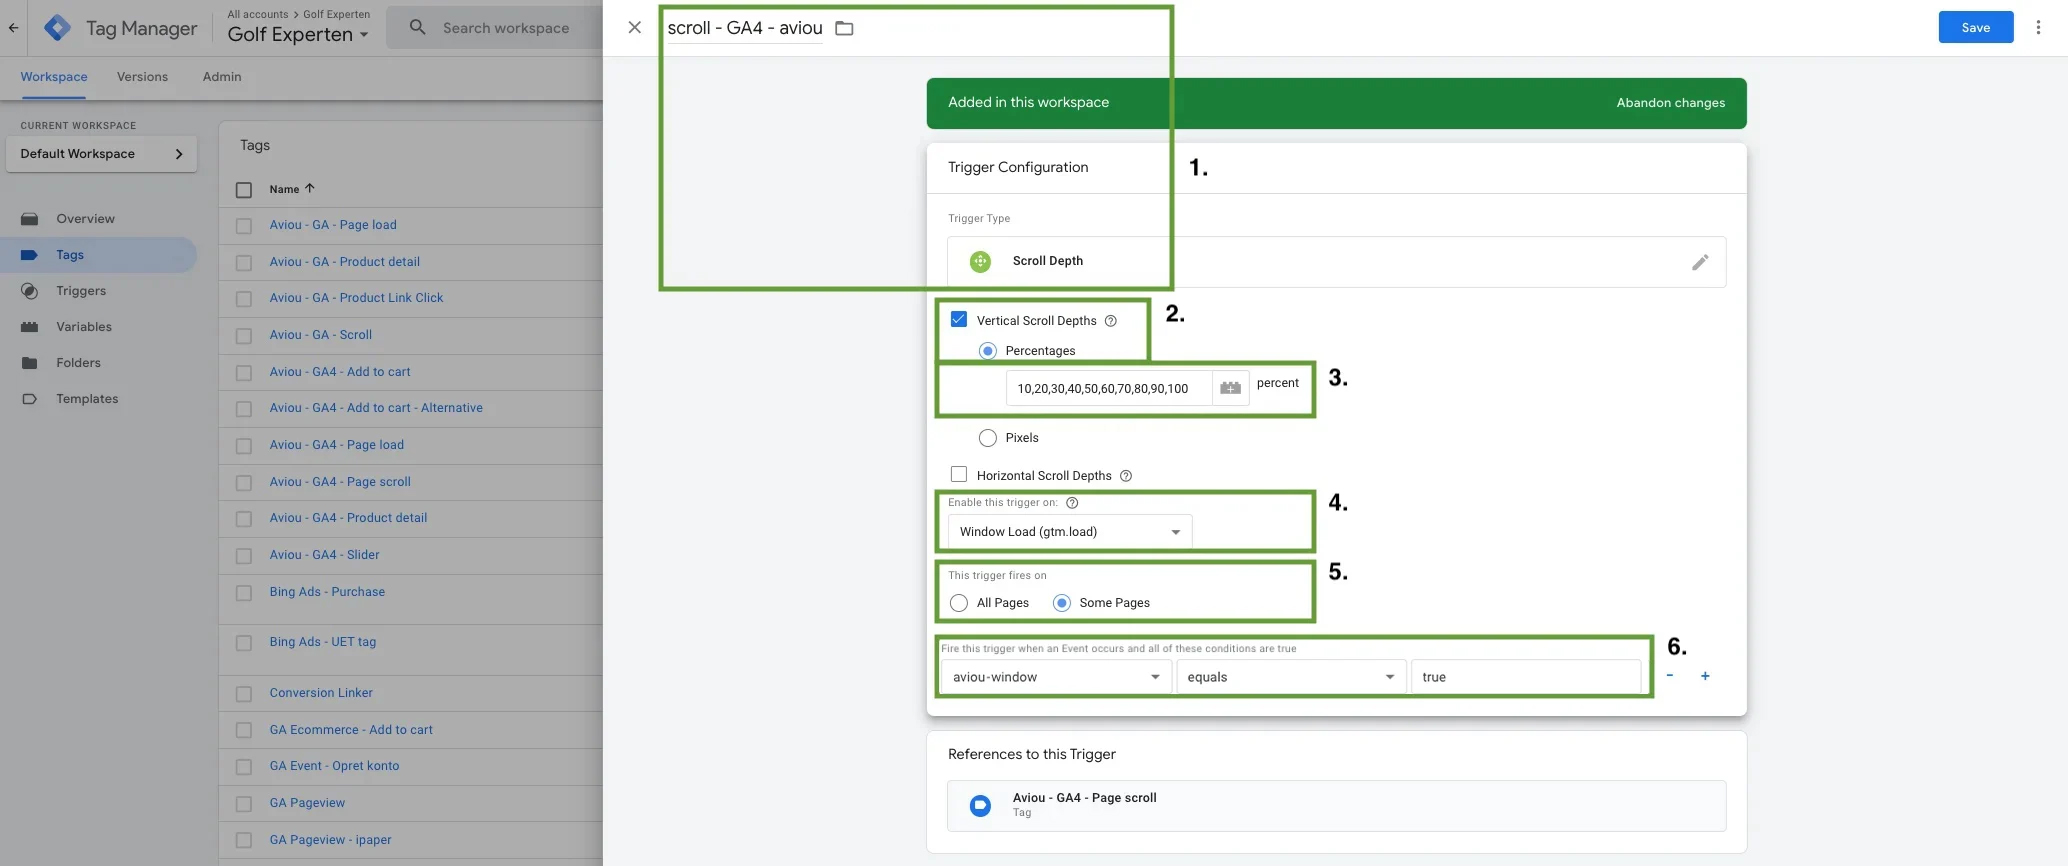
- Create a new trigger and name it “scroll - GA4 - aviou”. Select the Trigger configuration option and choose the Scroll Depth trigger under the User Engagement section
- Check the Vertical Scroll Depths option and choose percentages for measurement
- Set the intervals in the input field to “10,20,30,40,50,60,70,80,90,100”
- Set the trigger to enable on Window Load (gtm.load)
- Set the trigger to fire on Some Pages
- Choose your newly created variable aviou - window, then select equals in the middle dropdown, and type “true” in the input field to the right.
You are done! Click the Save-button to save the Trigger and then also save the Tag.
5. Set up the Read More event
Navigate to the Tags tab to start setting up the Read More event.
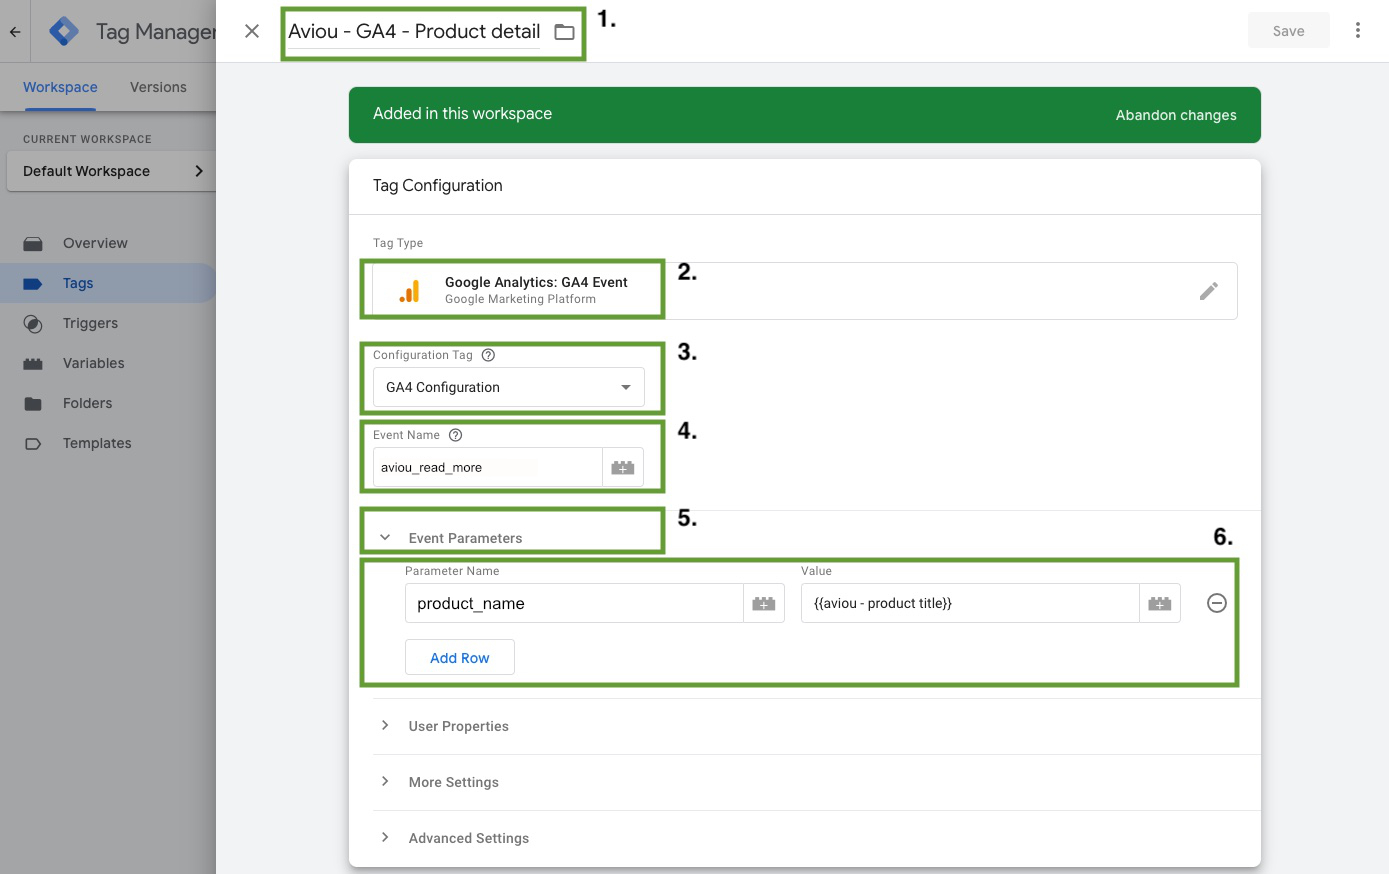
- Click the New-button and name the tag “AVIOU - GA4 - Product detail”
- Select the tag type called Google Analytics: GA4 Event
- Now select the Configuration Tag for GA4 in the dropdown list
- Give your event the name “aviou_read_more”
- Now expand the option called Event Parameters
- Select Add Row, call the Parameter Name “product_name” and click the + next to the value field. Select the newly ceated variable “aviou - product title”. Make sure the curly brackets are included.
Now it is time to create the trigger for your tag by clicking on "Choose a trigger to make this tag fire..."
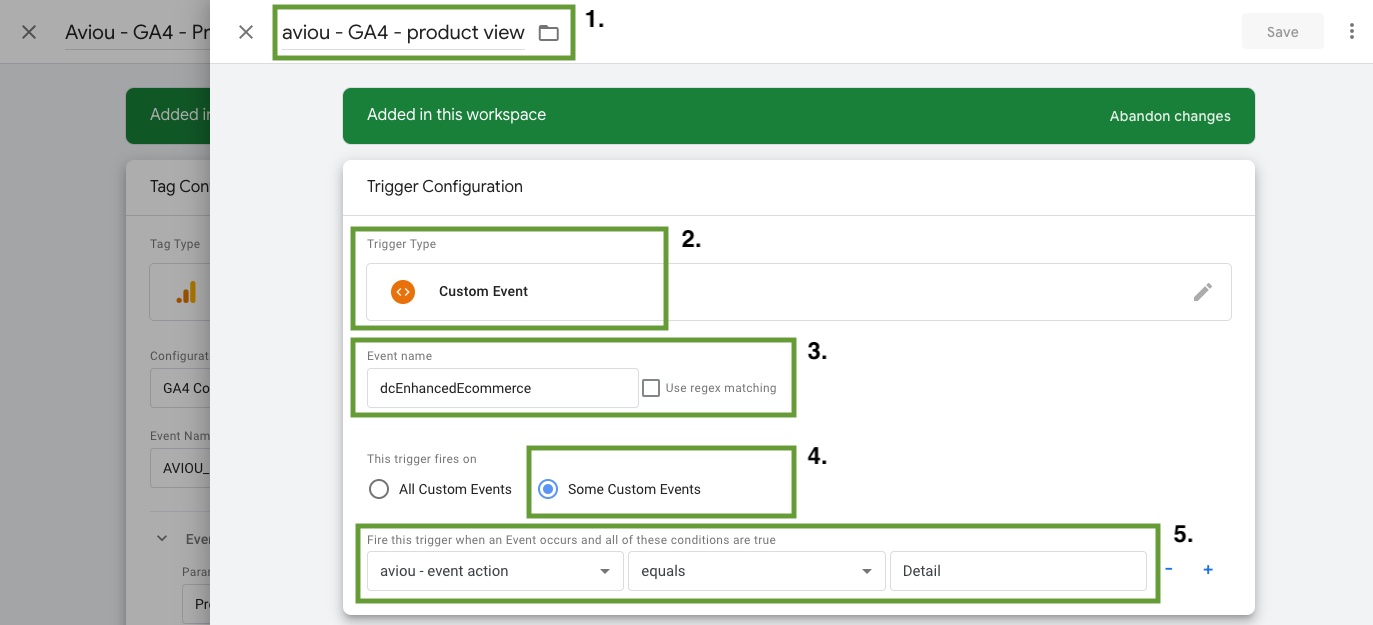
- Create a new trigger and name it “AVIOU - GA4 - product view”
- Select the Trigger configuration option and choose the Custom event trigger
- Set the Event name to “dcEnhancedEcommerce”
- Select Some Custom Events
- Now select the variable “aviou - event action”, set to equal and enter “Detail” in the input field
You are done! Click the Save-button to save the Trigger and then also save the Tag.
NOTE: To activate your newly created dimension “product_name” in GA4, you must update your GA4 settings as well. Find instructions on how to do this at the end of these instructions.
6. Set up the Add to cart event
Navigate to the Tags tab to start setting up the add-to-cart event.
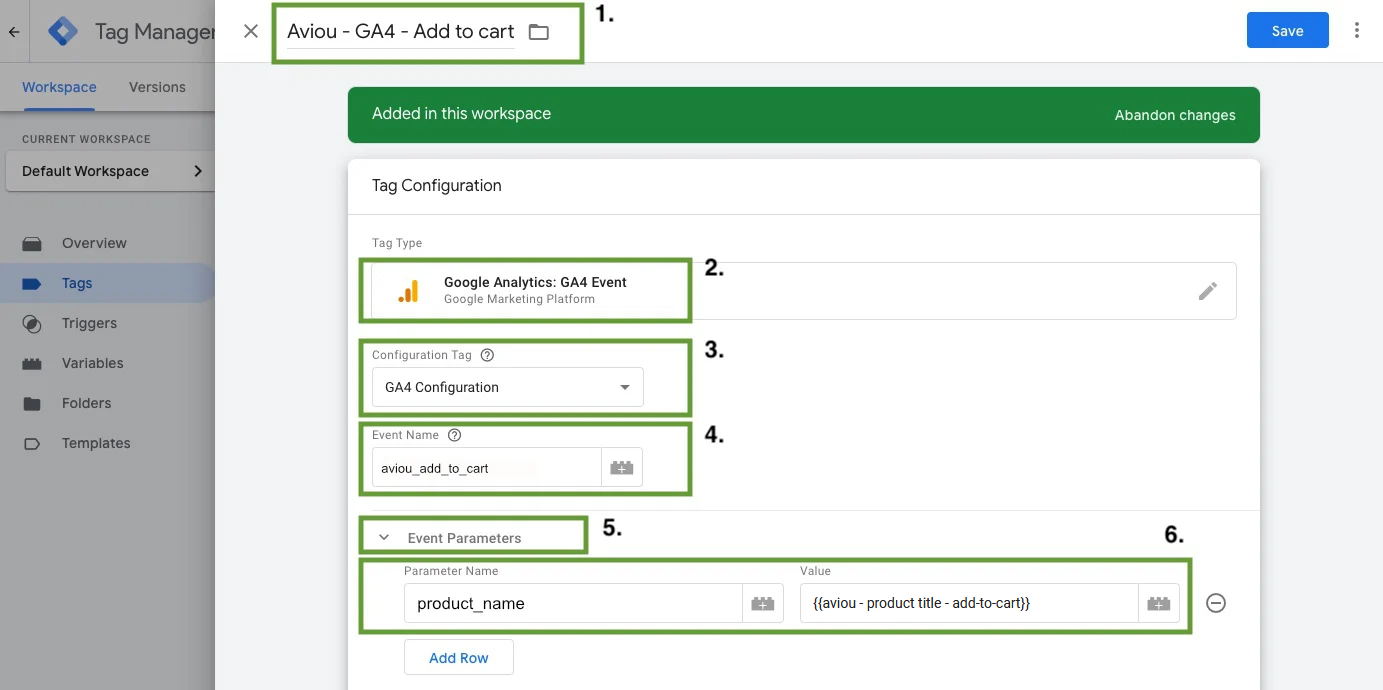
- Click the New-button and name the tag “AVIOU - GA4 - Add to cart”
- Select the tag type called Google Analytics: GA4 Event
- Select the Configuration Tag for GA4 in the dropdown list
- Give your event the name “aviou_add_to_cart”
- Now expand the option called Event Parameters and select Add Row
- Call the Parameter Name “product_name” and set the value to your newly created variable “aviou - product title - add-to-cart”. Make sure the curly brackets are included.
Now it is time to create the trigger for your tag by clicking on "Choose a trigger to make this tag fire..."
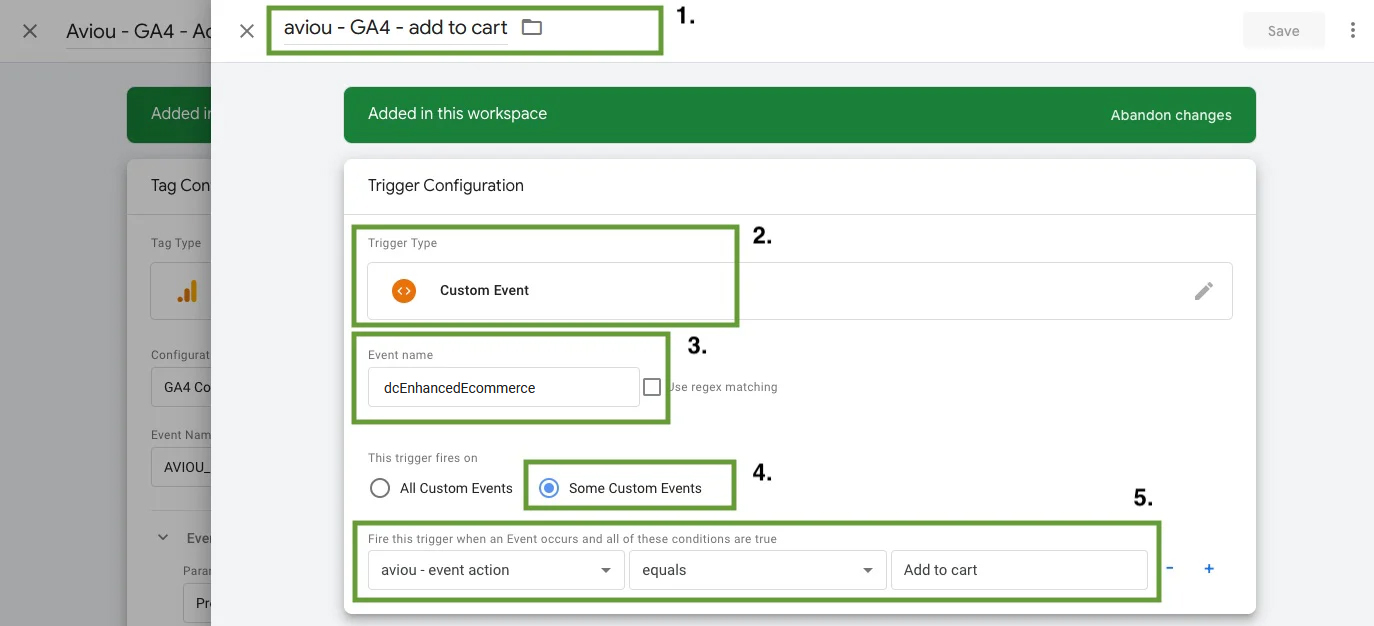
- Create a new trigger and name it “AVIOU - GA4 - add to cart”
- Now select the Trigger configuration option and choose the Custom event trigger
- Set the Event name to “dcEnhancedEcommerce”
- Select Some Custom Events
- Now select the variable “aviou - event action”, set to equal and enter “Add to cart” in the input field
You are done! Click the Save-button to save the Trigger and then also save the Tag.
NOTE: To activate your newly created dimension “product_name” in GA4, you must update your GA4 settings as well. Find instructions on how to do this at the end of these instructions.
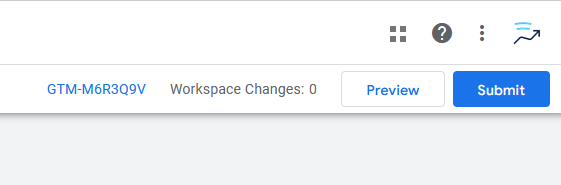
Remember to publish all the changes to your account på clicking "Submit".
7. Setting up custom dimensions in GA4
Finally to enable accurate reporting in GA4 we need to create some custom dimensions.
Start out by navigating to your GA4 account:
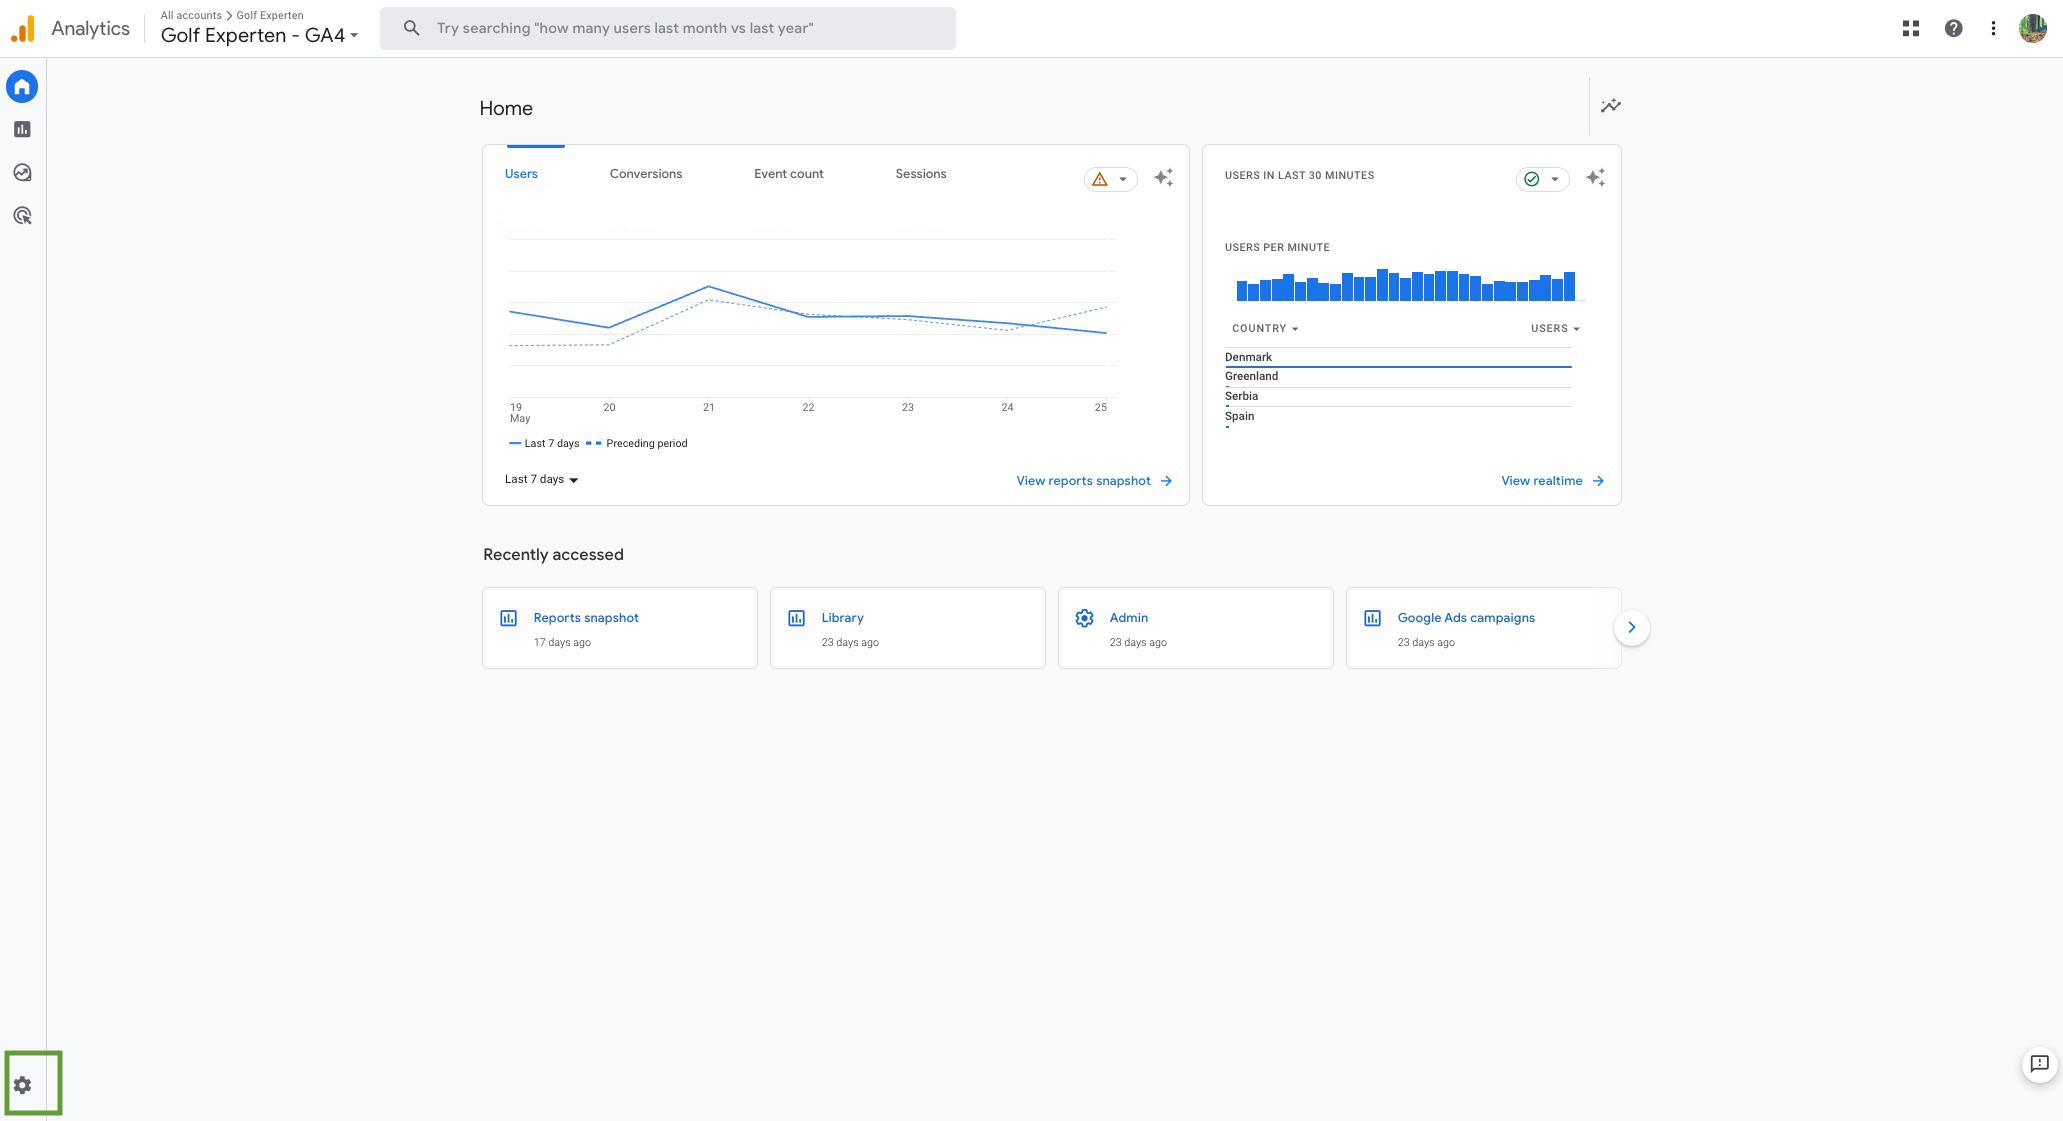
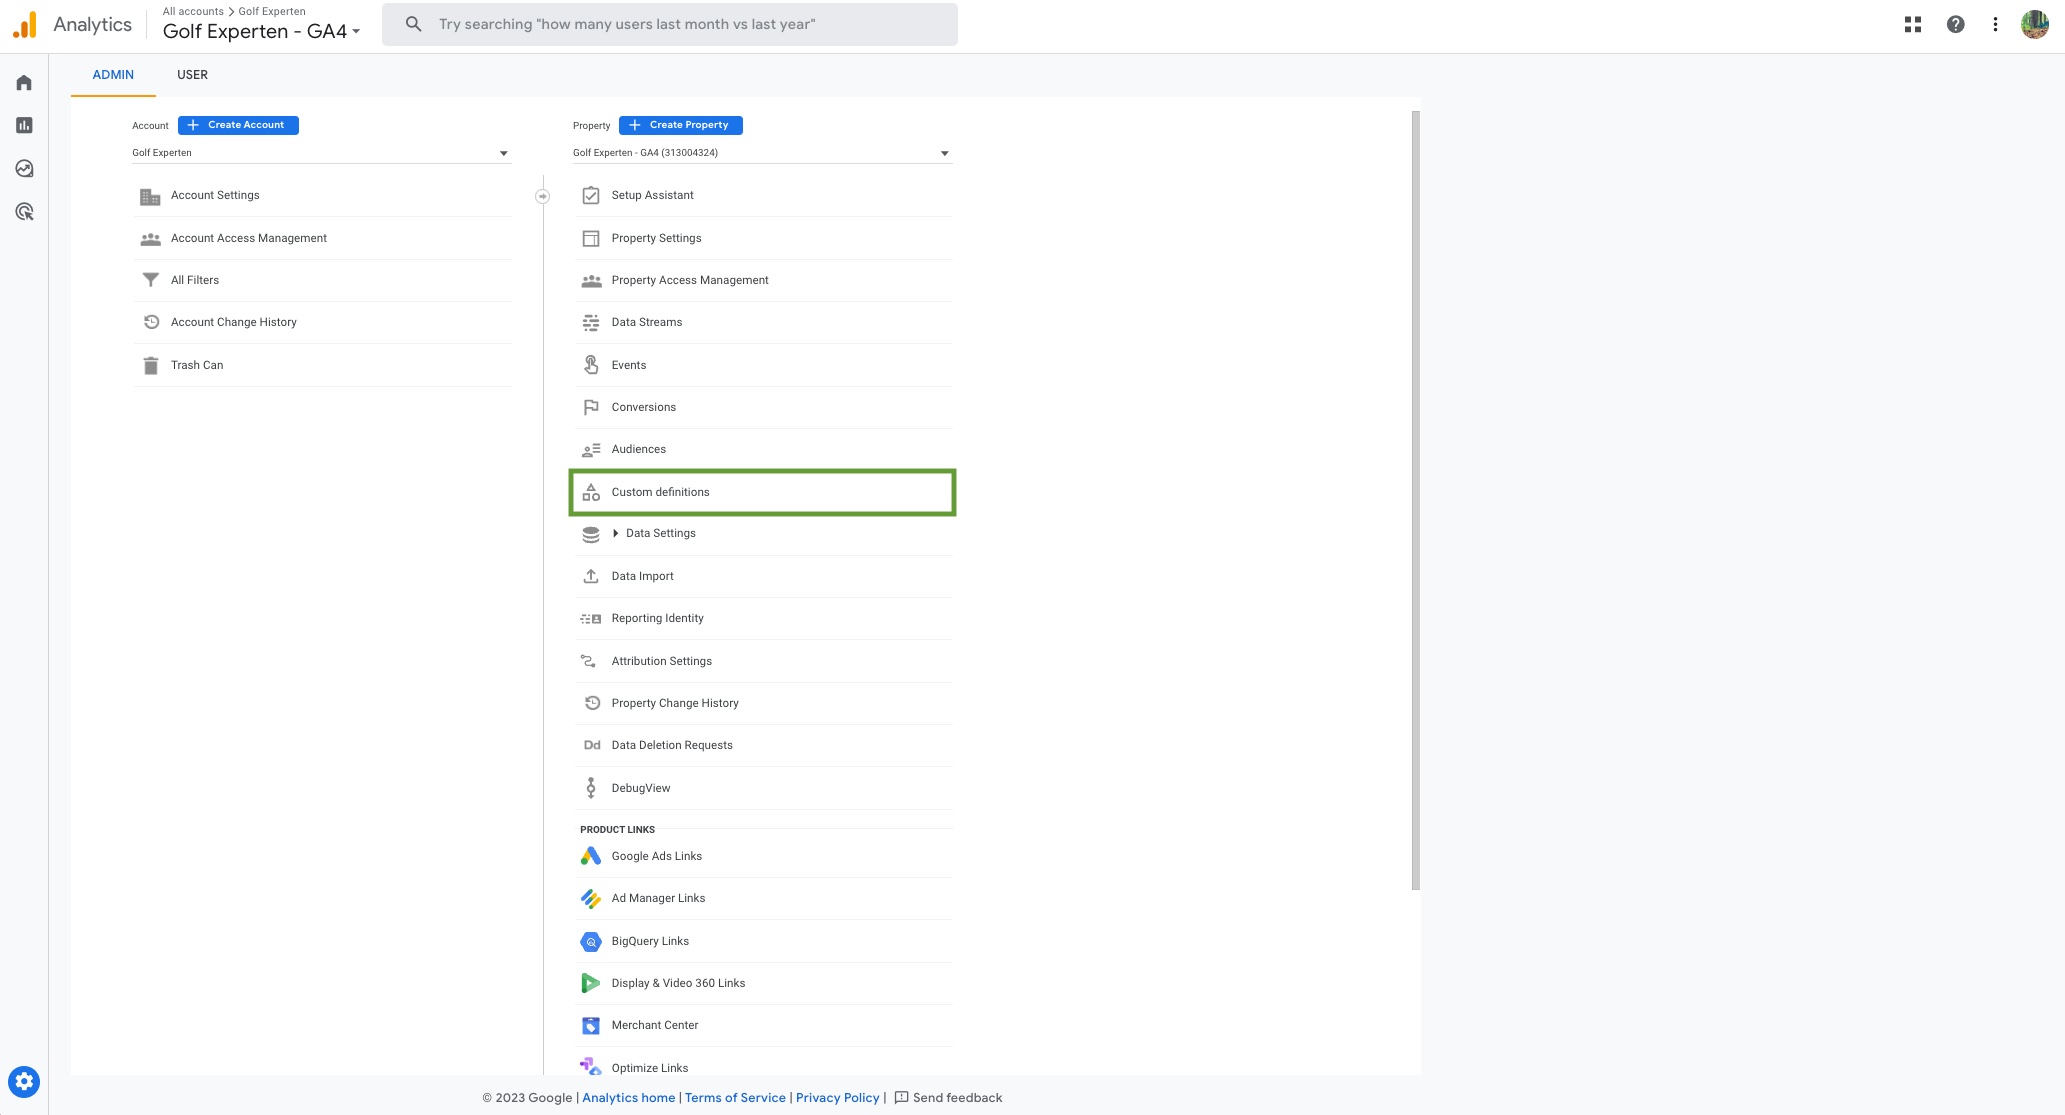
Choose the option Custom Definitions found under properties:
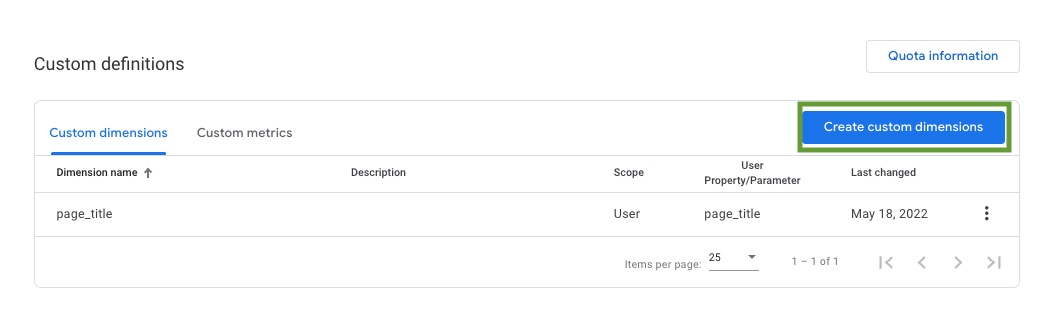
Click the button Create custom dimension:
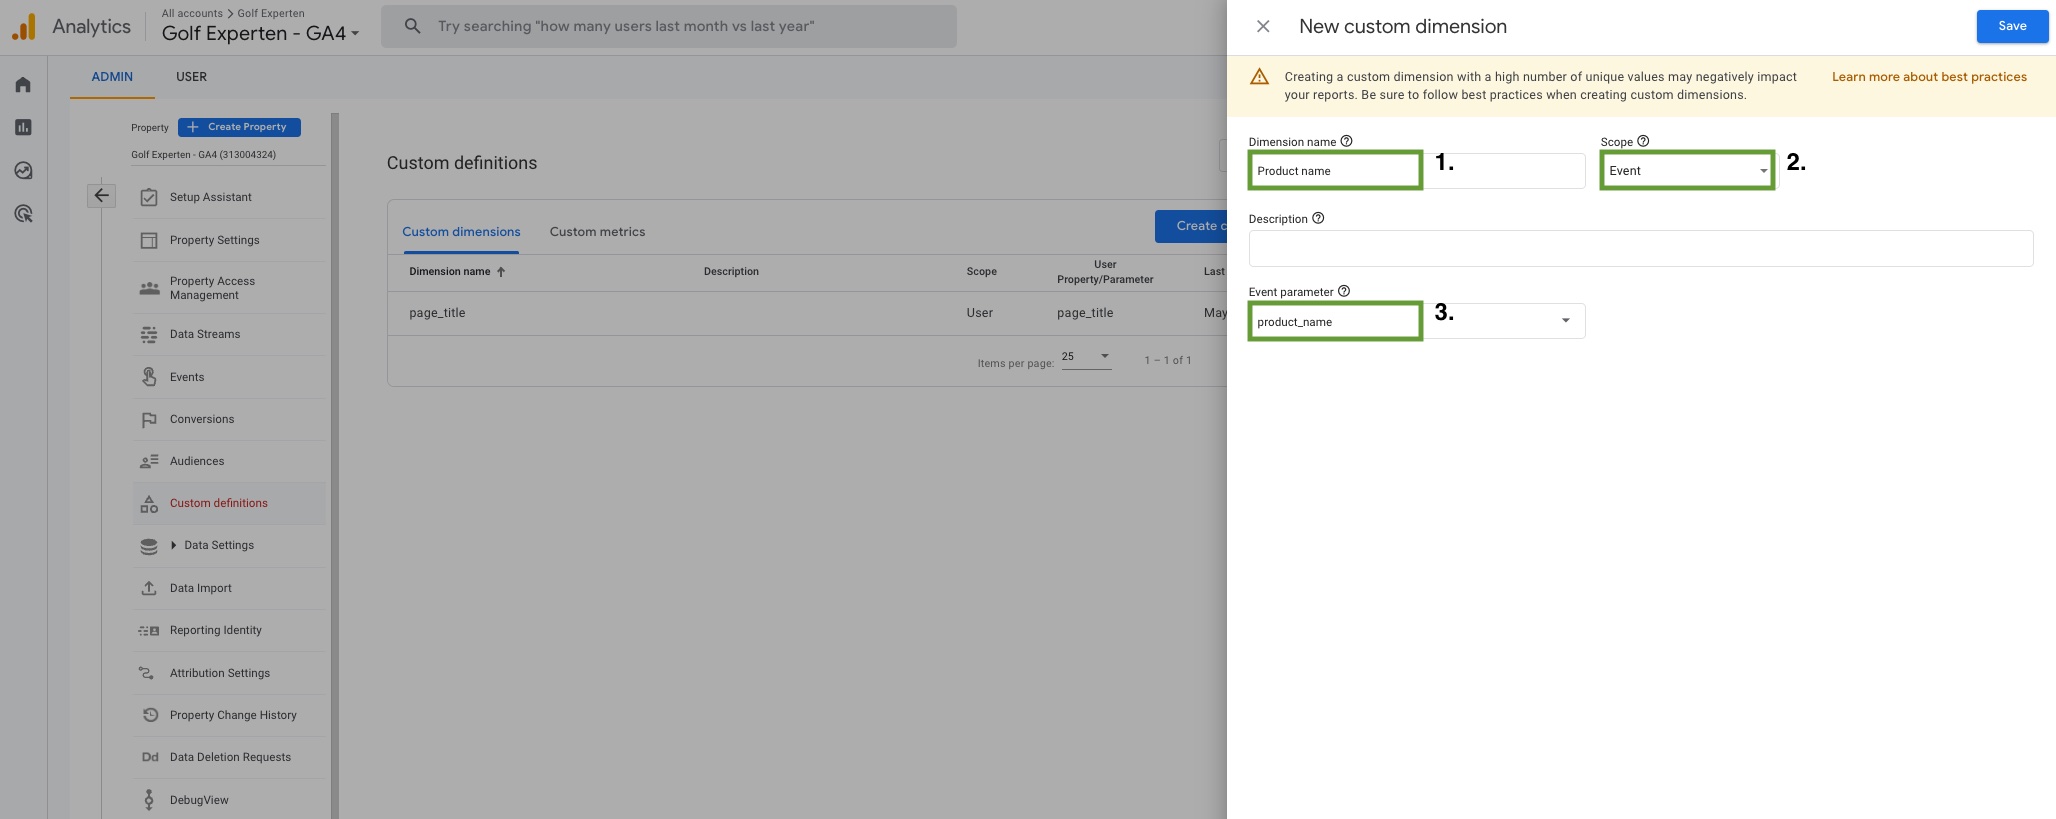
To set up your custom dimension
- Give the dimension a name. We suggest “Product name”
- Ensure the scope is set to Event
- In the Event Parameter type “product_name”
That's it. You have finished setting up the tracking!
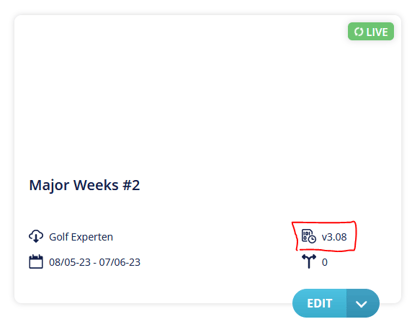
Make sure event tracking works for your publications
Your latest publication engine must be v3.08 or later for tracking to work on your publications. All publications made from the 1st of June 2023 and forward will have this version enabled by default.
If you have any publications that you want to track, that are not marked as 3.07 or below contact our support, and they will show you how to update this: help@aviou.io